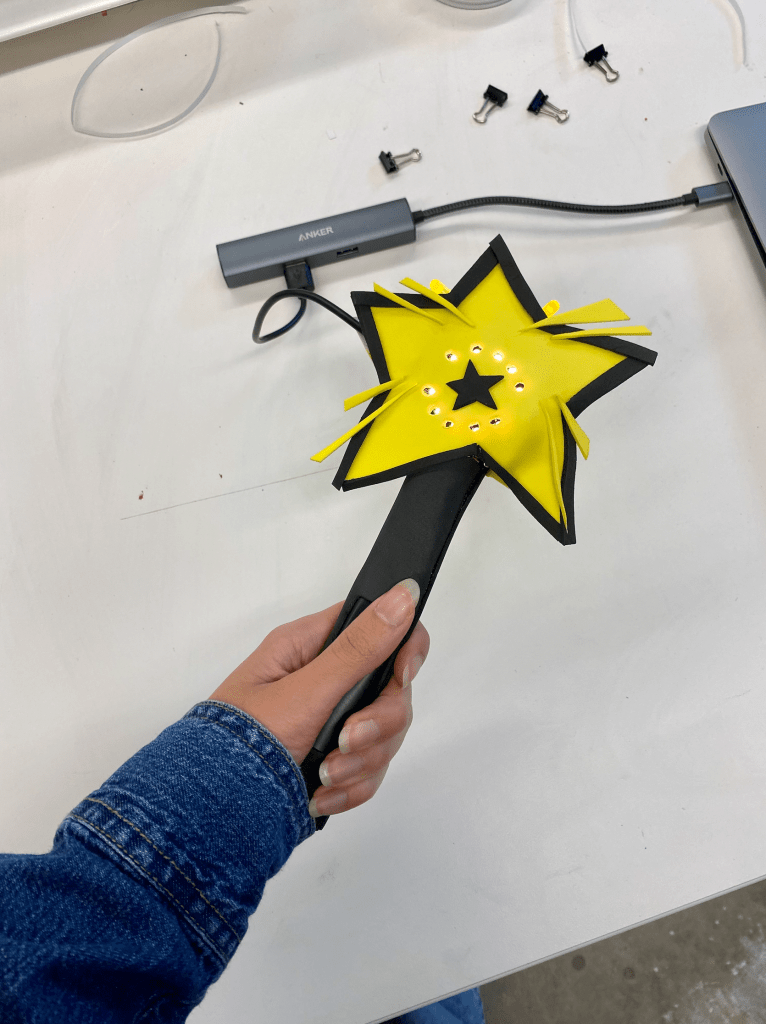
This project uses the pressure sensor and LED to make a “magic wand,” that lights up whenever the handle is squeezed.


First, sketch out the necessary connections using your design card. You can reference the LED and pressure sensor cards for guidance on what pins to connect to.


Instead of placing the copper tape directly onto the card, make the connection to the pins using two pieces of copper tape facing each other. This way our connections can hang freely without either side being sticky.

Use your original sketch as a guide to make sure your connections are correct.


Trace your CPX on the backside of your felt. Use the scale of this sketch to make sure that your star is big enough to enclose the CPX. Cut two stars out of one color of felt, and roll your other color of felt into a rod shape.


Carefully attach your pressure sensor to the handle. Make sure that the strands of copper tape do not overlap. Add tape to make sure your connections stay in place.


Tape velostat over the pressure sensor, then wrap an additional layer of felt around the handle. Make sure to cut out a section of the felt so that the velostat is exposed. Stick the two stars together so that they enclose the CPX and the legs of the LEDs.

The code of this project is uploaded at: https://makecode.com/_C2KCfVezv105
Download the code and upload it to your CPX. Now that you are done, press the handle of your wand to see the magic happen!